Virpets File Manager
The Virpets File Manager is the tool that integrates the models, worlds and sounds and allows the creation of a play to use with the Virpets system.
It has three programs to manage plays, scenes and puppets. From each program window you can access the other programs in the Tools menu.
VPD (Virtual Performance Descriptor) Manager
The file format that describes the play is the VPD file (Virpet Performance Descriptor).
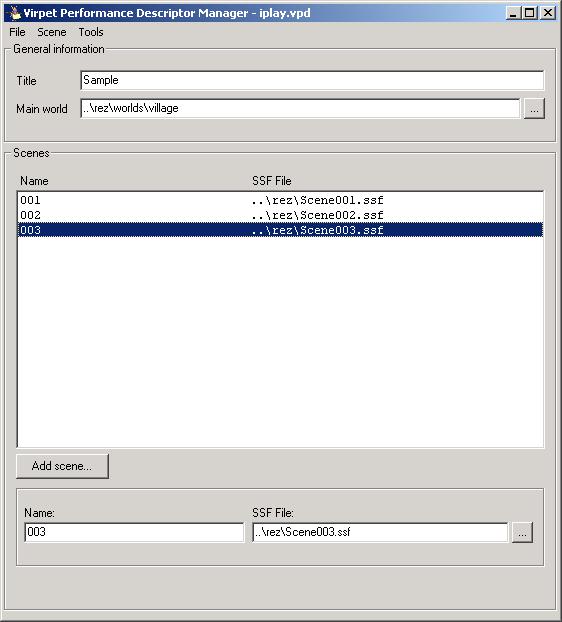
With the VPD Manager, you can create a new VPD file or open an existing one. Every time you change something you must save the file again.
The main world of a play is used if you only have one world for all the play. If you want to use one different world for each scene, you must leave this property empty.
In the list below, you can specify the scenes that the play is going to have. The stage will play the scenes in the specified order. Each scene in the list has a name and an .sff file that describes it.
To add a new scene to a play, click the Add scene
button. Then, specify the name and the SFF file for the new scene.
To edit a scene, just select it from the list and modify its properties. You can edit the SFF file of a specific scene opening the SFF Manager, using the option Edit SFF File from the Scene menu.
To delete a scene from the play, select it and press the button Delete or select the option Delete from the Scene menu.
SSF (Stage Scene File) Manager
The file format that describes each scene is the SSF file (Stage Scene File).
With the SFF Manager, you can create a new SSF file or open an existing one. Every time you change something you must save the file again.
The world of the scene is used if you want to have one different world for each scene. If you can use one world for the entire play, you must leave this filed empty.
You can specify a location for the Stage server using the nickname, server and port fields.
In the frame below, you can specify the list of puppets, sounds and camera views that you want to have in the scene.
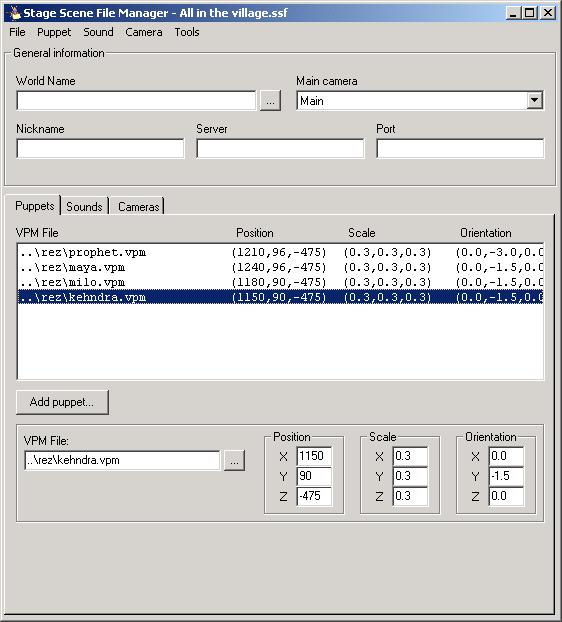
To add a new puppet to a play, click the Add puppet
button. Then, specify the VPM file of the new puppet, as well as the position, scale and orientation.
To edit the properties of a puppet, just select it from the list and modify them.
You can edit the VPM file of a specific puppet opening the VPM Manager, using the option Edit VPM File from the Scene menu.
To delete a puppet from the scene, select it and press the button Delete or select the option Delete from the Puppet menu.
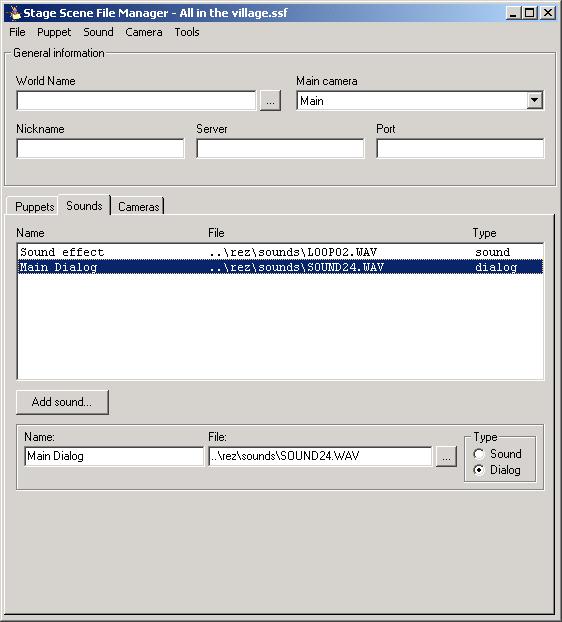
To add a new sound to a play, click the Add sound
button. Then, specify the name and the .wav file of the sound. Select if the sound is going to be a sound effect or a dialog. With a sound effect you can only have one .wav file. For the dialogs, you must name the .wav files consecutively ending with 001, 002,
Select any of the files to specify the dialog.
To edit the properties of a sound, just select it from the list and modify them.
To delete a sound from the scene, select it and press the button Delete or select the option Delete from the Sound menu.
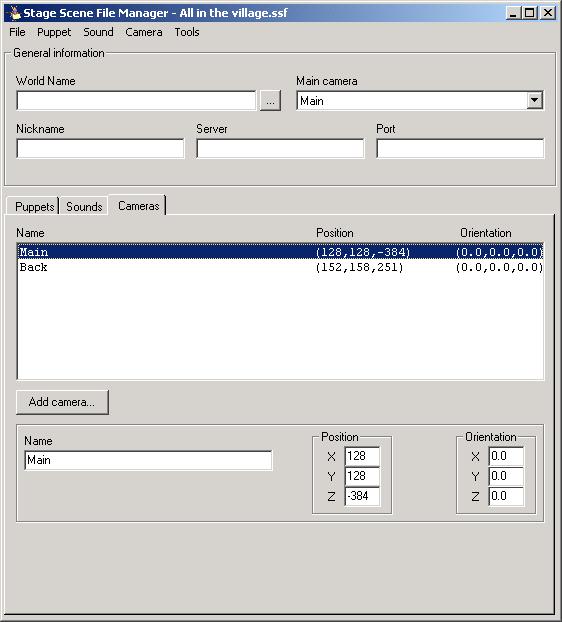
To add a new camera view to a play, click the Add camera
button. Then, specify the name, the position and the orientation of the new camera.
To edit the properties of a camera, just select it from the list and modify them.
To delete a camera from the scene, select it and press the button Delete or select the option Delete from the Camera menu.
NOTE: If you are using just one world for the whole play: After specify the camera view list, select one of the camera angles as the main camera, that will be the starting point of the scene.
VPM (Virtual Puppet Mapping) Manager
The file format that describes each puppet is the VPM file (Virtual Puppet Mapping).
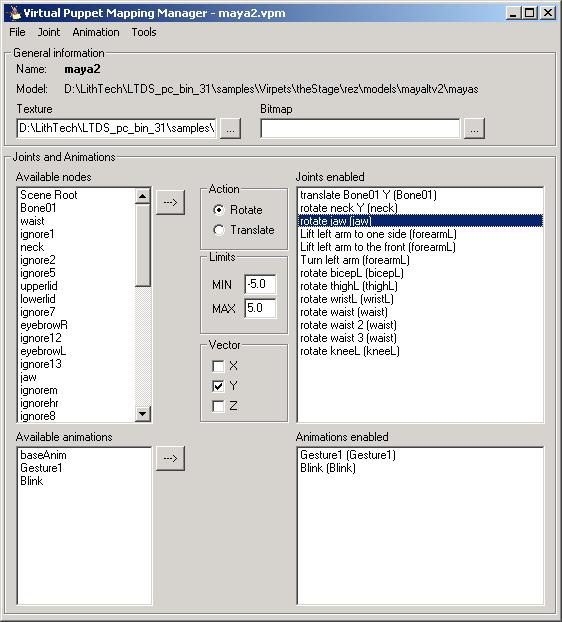
With the SFF Manager, you can create a new VPM file or open an existing one. Every time you change something you must save the file again.
To create a new VPM file, select the option New from the File menu. Then, specify a name for the puppet and select the model that you want to use (it must be an .lta file saved from ModelEdit).
You can specify the texture that will be used for the model (selecting a .dtx file). The bitmap is the file that the PuppetMaster will show when you are mapping the puppet movements to the input devices.
Joints and Animations
In the left part of the window, theres the list of the available nodes and animations of the model. In order to control a movement of the puppet, you must create joints and animations in the lists on the right side of the window.
If you want to use a node, select it, then specify what kind of movement you want to make (rotation/translation), the limits of the movement (min and max) and the orientation of the movement (axis x, y and z), and then click the >> button to add the joint. Write the name of the joint. To edit a joint, just select it from the list on the right and edit its properties. To rename it, select the option Rename from the Joint menu. To delete a joint, select it from the list on the right and then hit the delete button or select the option Delete from the Joint menu.
If you want to use an animation, just select it an animation on the left side and click on the >> button. Write the name of the new animation. To rename an animation, select the option Rename from the Animation menu. To delete an animation, select it from the list on the right and then hit the delete button or select the option Delete from the Animation menu.
|