So, let's get right down to the brass tacks.
So, if you simply project five images, you'll see glaringly apparent bands of brightness where the images overlap. This is a distracting visual artifact, and we don't like distracting visual artifacts.
The solution we've implemented to compensate for the overlap regions is to apply an alpha mask to the entire screen, which darkens the image appropriately along the edges. If we feather the edges of each screen just right, each pair of neighboring images will blend together perfectly, and the audience will perceive one continuous image from left to right.
That's the theory, anyway. In practice it never works out perfectly, thanks to...
And, as if that weren't enough...
It's sad but true. No matter how much you fudge it, the overlap is always going to be visible in some form or another. So the best we can hope for is to minimize the overlap in the general case.
First, let's deal with the code to put the alpha mask on the screen. We implement the alpha mask as a child of the UnrealScript HUD class. We actually want five different masks (one for each projector), so rather than build five different copies of the module, we include all five textures in the module, and specify which one to use in a config file. Below is the complete code for the MaskHUD class.
Below is the complete code for the MaskHUD class.
// the "config(MaskTest)" at the end of the class definition means "variables
// from this class which are declared using the 'config' keyword should be
// loaded from/stored to the UT/System/MaskTest.ini file.
class MaskHUD expands HUD config(MaskTest);

// these lines tell the compiler to load the five mask textures and store them,
// along with the compiled UnrealScript code, in the final Foo.u file.  I'm not
// entirely sure what the syntax of the #exec command is :-), but it definitely
// works.  The important fields are NAME, FILE and GROUP -- once the texture is loaded,
// you refer to it in the code as Texture'MyModule.GROUP.NAME' (see below).
#exec TEXTURE IMPORT NAME=ProjMaskA FILE=Textures\Masks\ProjA.pcx GROUP="Masks" MIPS=OFF FLAGS=2
#exec TEXTURE IMPORT NAME=ProjMaskB FILE=Textures\Masks\ProjB.pcx GROUP="Masks" MIPS=OFF FLAGS=2
#exec TEXTURE IMPORT NAME=ProjMaskC FILE=Textures\Masks\ProjC.pcx GROUP="Masks" MIPS=OFF FLAGS=2
#exec TEXTURE IMPORT NAME=ProjMaskD FILE=Textures\Masks\ProjD.pcx GROUP="Masks" MIPS=OFF FLAGS=2
#exec TEXTURE IMPORT NAME=ProjMaskE FILE=Textures\Masks\ProjE.pcx GROUP="Masks" MIPS=OFF FLAGS=2

// declaring a variable as "config" means that that variable CAN be loaded from/
// stored to the configuration file specified above, in the class declaration line.  For example, we
// could specify a value for the ET_Mask variable by adding the following lines to
// UT/System/MaskTest.ini:
//
// [MaskTest.MaskHUD]
// ET_Mask=MaskTest.Masks.ProjMaskA
//
// In this case, we keep a configuration file filled with any information which
// needs to vary from Spectator to Spectator.  This includes the name of the
// texture to use as the Mask for this spectator.
var config string ET_Mask;

function PostRender(Canvas C) {
	// Switch the rendering style to STY_Modulated, which means that when a texture is drawn,
	// a pixel value of 0-126 DARKENS whatever is behind the pixel, 127 has no effect, and
	// 128-255 BRIGHTENS what's behind the pixel.  This is why all the pixels in our mask
	// are 127 or lower.
	C.Style = ERenderStyle.STY_Modulated;
	C.SetPos(0.0, 0.0);
	// this is an idiom to translate the string we read from the config file,
	// ET_Mask, into a Texture object which we then pass to DrawRect.
	C.DrawRect( Texture(DynamicLoadObject(ET_Mask, class'Texture')), C.ClipX, C.ClipY );
}
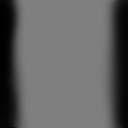
So, that's the code. Now the only thing left to do is create the actual mask textures. Let's recap some technical information about the mask textures, actually! Like all Unreal textures, the masks must be 256x256, 8-bit PCX files. In particular, the masks should be a perfect middle grey wherever you want the screen to be normal brightness, and darker than middle grey (approaching black) where you want the screen to be darker. So, a mask ends up looking something like this:

Intitially, this sounds like several hours of tedious work - visually guesstimating how much the projectors overlap, manually whipping up an appropriate mask in Photoshop, and tweaking it until it looks right. But I assure you, it's actually much MUCH worse than that.
What this means is that your visual guesstimation doesn't tell you anything much about what the final mask should look like. So, the brute-force way of doing this would be to just iterate through each seam, guessing what the mask should look like, running UT, tweaking the masks…repeat ad nauseum. That's how we did them this cycle, and it was no fun. Plus, if the projector alignment ever changes in the future, the masks need to be redone. So it's in your best interest to streamline the process as much as possible.
The RIGHT way is to automate the process. Here's how I would do it:
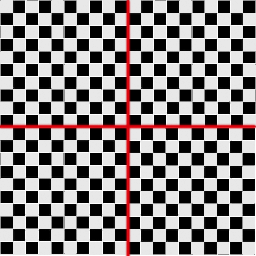
First, using a slight variation of the code above, create a HUD that's a solid checkerboard pattern. I've provided one below, a 20x20 grid with a red "crosshair" to clearly show where the center is.

Using the grid, it should be easy enough to pick out where where a point on the screen lies on the texture (let each grid square be .1 units wide and .1 units high, so you can describe any point on the screen as, say, (-0.4, 0.6) counting outwards from the center. Project this texture in turn upon each screen, with the neighboring screens projecting solid blue (i.e. pull out the video input).
Take note of where on the grid the overlap BEGINS and ENDS at each of the four corners of the screen (a total of 8 points). You can translate those points into points in the grid texture. Now you know where the gradient from grey to black should begin and end at each corner of each screen, and creating the masks should be MUCH easier.
In fact, if I don't find the time to do it myself, I would whole-heartedly recommend somebody code-savvy writing a program that takes as input the 8 points you record after looking at the grid HUD, and spits out the appropriate mask PCX files. It really shouldn't be that difficult, I'd be happy to help.